Crocheting a ball can be surprisingly tricky. If you get your placement of increases and decreases wrong, it’ll turn out wonky and not the shape that you wanted. It could have a point sticking out at the beginning, the increasing could be too abrupt and cause a ripple, or the whole thing could turn out like a squashed potato. I’ve definitely been there, and I’ve worked out a pretty good system for making my crochet balls shaped nice and round all the way around.
The Most Important Thing to Remember: It’s All in the Spacing of Increases and Decreases
The best way to make your work spherical is to start out by making a flat disk, some spaced out increases, a few rounds with no changes, then decrease by a reduced amount until the last disc, then gather the stitches after stuffing it. That’s a bare-bones description of what my method is, but I’ll give much more detailed instructions below.

After doing the final increase round, you can adjust the number of plain rounds to change how tall your sphere is. Mine are intentionally a little squat, because I think it makes the plushies cuter, but if you want a more perfect sphere, you should do two or three more plain rows than my pattern will call for. I’ll include a note in the pattern to specify this detail.
The main plushie I make out of this pattern is actually a stress ball rather than a typical plushie. That’s why I like to make them a little flat: to give the faces a sort of cutesy effect. But they are still mostly a perfect sphere, and if you follow the note to add extra rounds, it’ll be even better.
Without further ado, here’s the pattern.
Sphere Pattern
Terms
MR – magic ring
Sc – single crochet
Inc – increase
St(s) – stitch(es)
Rnd(s) – round(s)
Dec – decrease
Steps – Quick Version
- MR 6 sc
- Inc by 6 until 30sts [4 rnds]
- Inc by 5 until 40sts [2 rnds]
- Inc by 4 until 44sts [1 rnd]
- Sc for 3 rnds*
- Dec by 4 until 16sts [7 rnds]
- Fasten off, stuff sphere firmly, and gather opening shut.
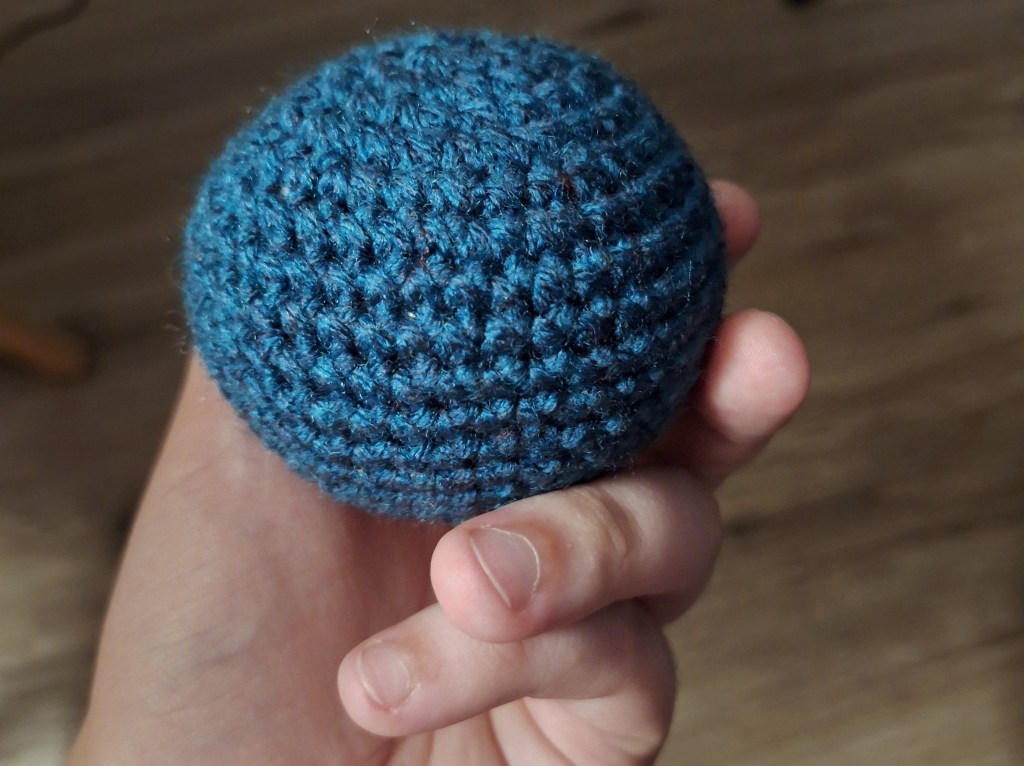
*= Start decreasing after 3 rnds for a slightly shorter sphere (as pictured above.) For a full sphere, work 5 rnds instead before starting to decrease.
Steps – Detailed Version
- MR 6 sc [6]
- Inc 6 sc [12]
- (Inc, sc) 6x [18]
- (Sc 2, inc) 6x [24]
- (Inc, sc 3) 6x [30]
- (Sc 5, inc) 5x [35]
- (Inc, sc 6) 5x [40]
- (Sc 9, inc) 4x [44]
- Sc 44
- Sc 44
- Sc 44*
- (Dec, sc 9) 4x [40]
- (Sc 8, dec) 4x [36]
- (Dec, sc 7) 4x [32]
- (Sc 6, dec) 4x [28]
- (Dec, sc 5) 4x [24]
- (Sc 4, dec) 4x [20]
- (Dec, sc 3) 4x [16]
- Fasten off and stuff firmly. Using yarn tail, weave through the front loops of all 16 sts and pull to gather opening. Sew a few stitches to secure gather, then poke through sphere to opposite side and pull through before cutting yarn up close against the sphere. Squish into shape.
*= At this point, I start my decreasing because I like a shorter sphere for my projects. If you’d like your sphere to be closer to a true sphere, work an additional two rounds of 44 sc before beginning to decrease.
Final Tips
- If your sphere isn’t big enough, add more rounds with increases, especially the ones with 6 increases to make it mostly flat at first. This will help make the sphere not have a pointy tip.
- It’ll round out more once it’s stuffed, even if it looks too flat while you’re working.
- Tighter tension is always better for stuffed projects, so consider going down a hook size or two to make your stitches even tighter. Don’t go too far though, or you’ll increase hand strain significantly, and risk splitting your yarn more frequently.
- You don’t have to make spheres with just single crochet – you can use any stitch that allows for increasing and decreasing! You just need to account for the height of the stitch and accommodate for that in your increases – for example, to make a sphere with double crochets, you would start with a magic ring of 12 stitches since they’re twice the height of single crochets.


Leave a comment