
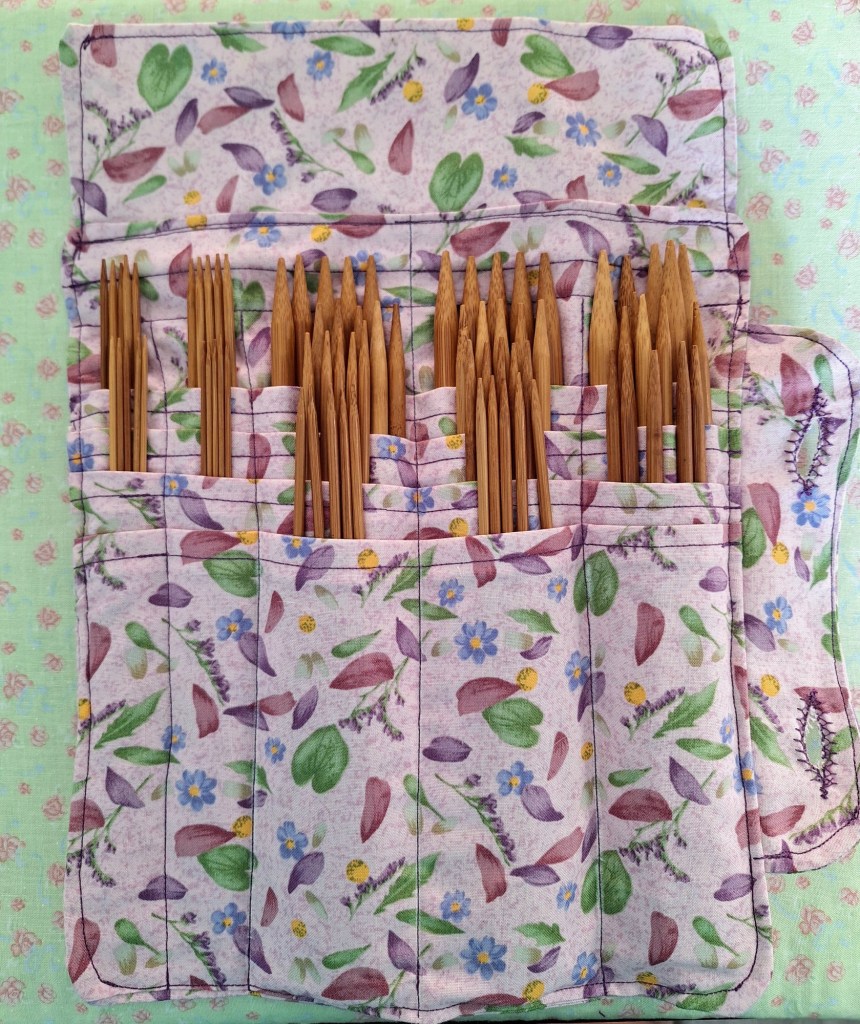
I recently got myself a lovely full collection of wooden double-pointed knitting needles, with sizes ranging all the way from 2.0mm up to 10.0mm. It’s a lovely set, and I’m very excited to do some more knitting with them, but it’s tricky to store them without getting them all mixed together. So I decided to sew myself a case to hold them all neatly!
It was a bit of a journey making this project.
I sketched up a picture of what I wanted, and then tweaked it to make it work better. My first design was wider and shorter, but I thought it would be better to keep it more compact and vertical. Next, I sketched it out again, but this time with measurements.
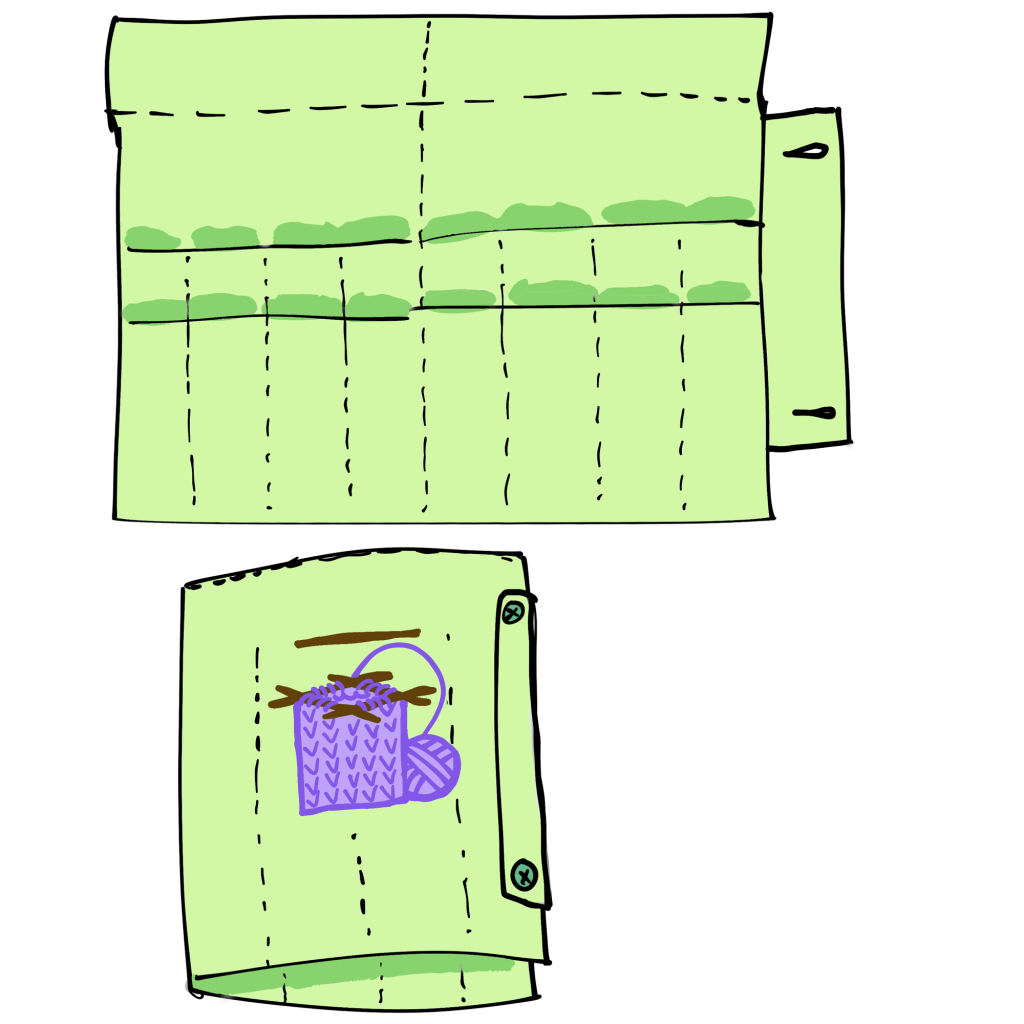
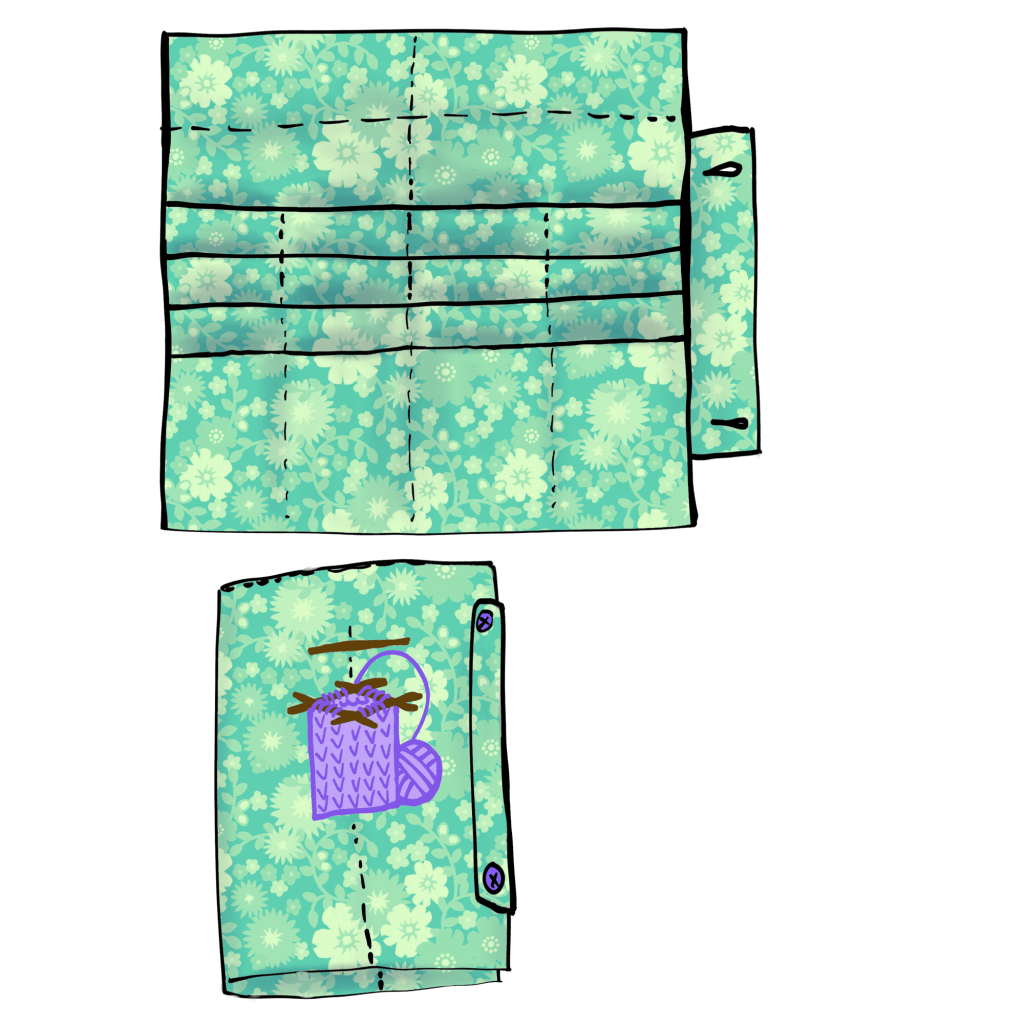

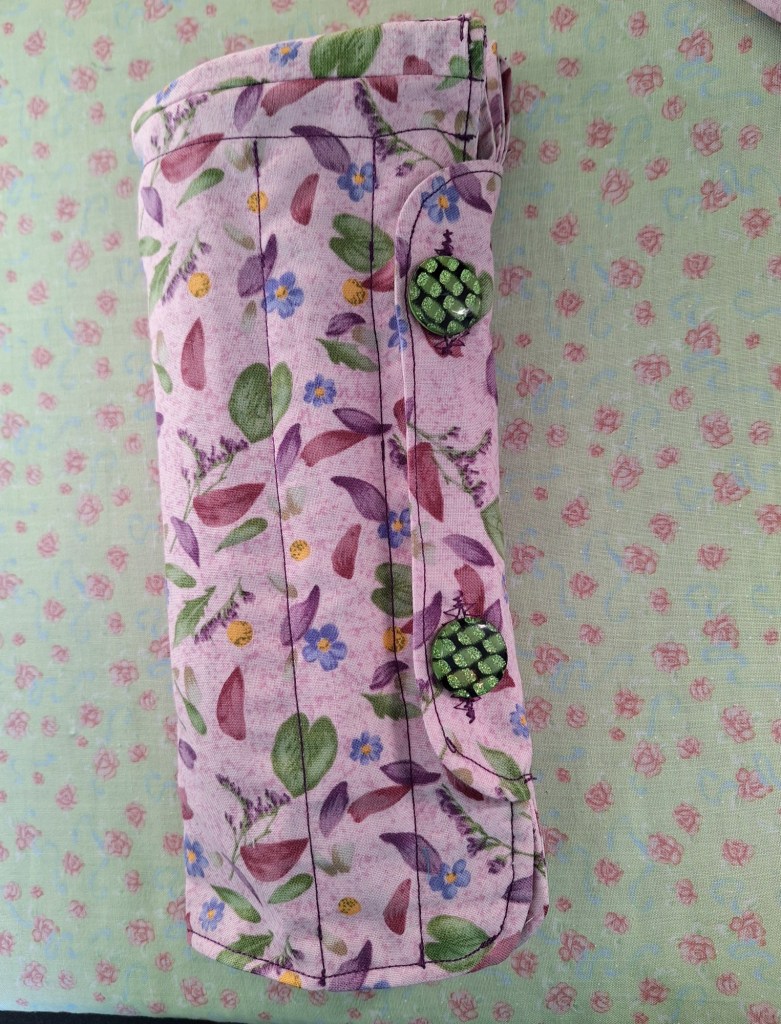
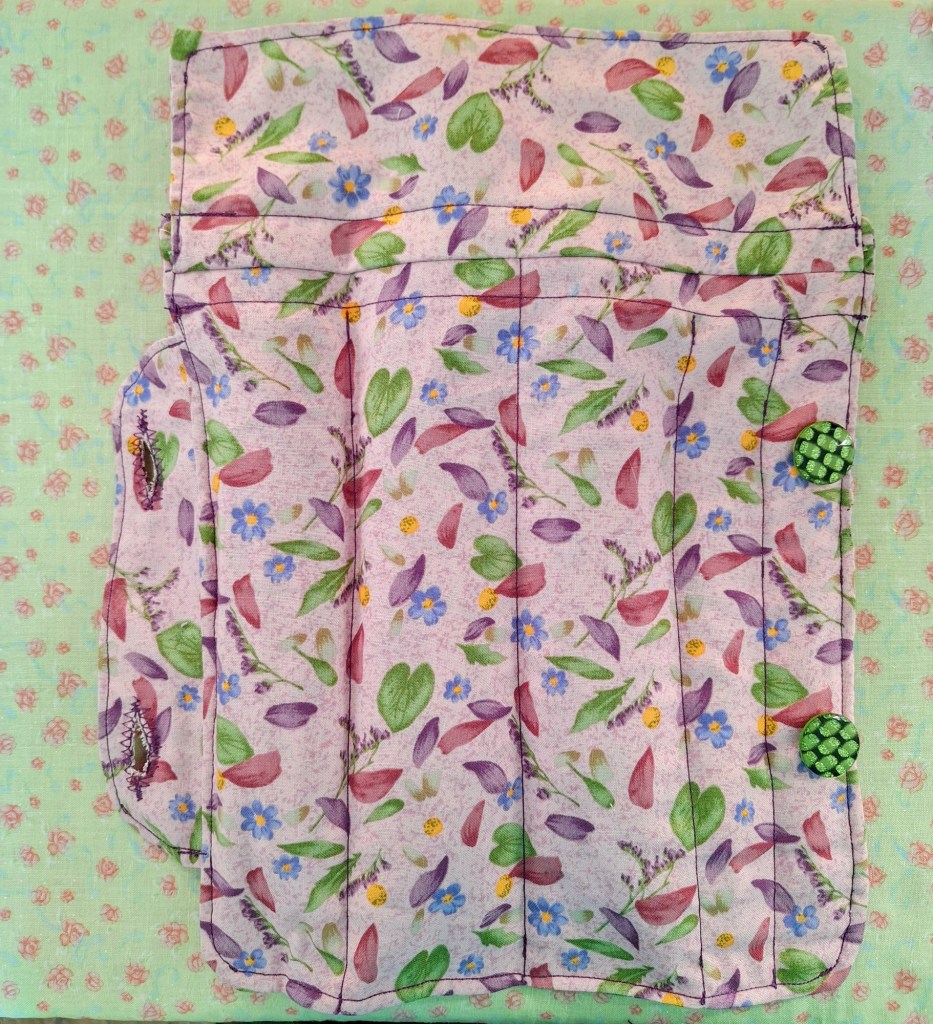
The collection includes 15 different sets of needles, so I needed at least that many pockets. I wanted to include a flap for the top to make sure they don’t slide out, and a button flap on the side to hold it all closed. I thought I might add a design on the front showing the needles in action, but I ended up not adding that. Maybe I’ll add it at some point, but I haven’t yet.
Unfortunately, while I was cutting out my pieces, I was a bit careless with the rotary cutter and had an accident. No major damage, but I got my fingertip and had to wait for it to heal before continuing the project. It was frustrating having to wait, but I knew it would be better to do so.
Today I decided I had waited long enough and I finished cutting up the pieces – extra carefully, having learned my lesson – and got to work sewing it together with my sewing machine.
I hemmed the pocket pieces and then sewed them in staggered rows onto one of the back pieces. I made the buttonhole flap and pinned it all in place with the other back piece on top, then sewed most of the way around with a small gap left for turning it right side out. After turning it out, hand sewing the gap closed, and pressing everything, I sewed the pockets into sections, and then tested it out.
I ended up adding an extra section for the smaller needles, to give more room for the big ones, and I had to extend the top flap to make sure everything would stay in place.
The final touches included sewing around the edges, hand sewing on buttons, and testing it out again. This time, it worked perfectly! Well, I could have spaced out the pocket sections a bit better to accommodate the larger needles, but other than that, I’m extremely happy with the results.


Leave a comment